Introduction
It’s nearing the end of the warm season in Alameda County, but despite shortening days and cooling temperatures, there’s still an opportunity to get into the garden and plant something new. Planting spring-blooming bulbs in fall is a relatively easy task that will reward you (and pollinators!) with bouquets of blooms from late winter through the spring. Whether you have an entire bed or lawn or just a small container, there are spring-blooming bulbs that will work for your space. In this article, you’ll learn which bulbs you can plant, how to choose what’s right for your garden, and how to plant and care for these bulbs.
Selecting Bulbs to Plant in Fall

.jpg)
.jpg)
_20250415_093451.jpg)
Here are some options to consider for your garden:
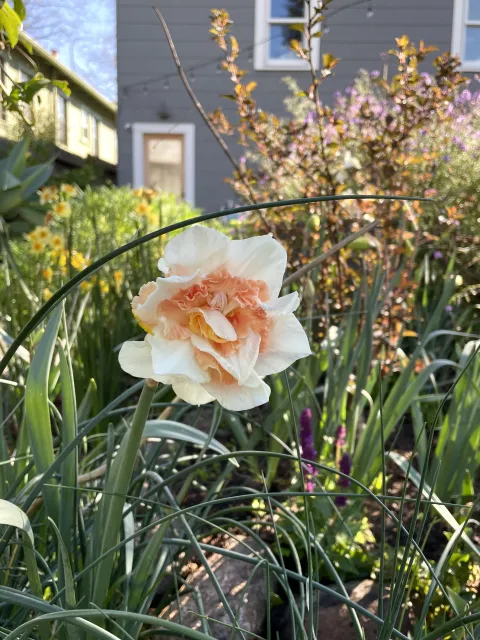
- Daffodils (Narcissus): Cheerful yellow or white blooms that naturalize (return in increasing quantities) easily. Daffodils are deer- and gopher-proof (they contain toxins unpalatable to these critters) and will return year after year with minimal care.
- Tulips: Classic cup-shaped flowers in a rainbow of colors. Standard hybrid tulips are often treated as annuals in our mild-winter area, since they may not reliably rebloom after the first spring. For better perennial results, choose species tulips (e.g. Tulipa saxatilis, T. clusiana), which often repeat-bloom in our climate. Knowing whether a tulip will rebloom in Alameda can be tricky, as many tulip bulb packages are written for a wide audience including gardeners in colder climates. Some bags will include a hardiness zone, or you can ask the garden center employees for their advice. Tulip bulbs are a favorite snack for gophers and deer, so plant them in protected areas or containers if wildlife is a concern.
- Crocuses and other small bulbs: Crocuses, grape hyacinth (Muscari), glory-of-the-snow (Chionodoxa), snowdrops (Galanthus), and similar small bulbs are among the first flowers to appear in late winter. They do well in our area and can be tucked into garden borders or even lawns. Many of these will naturalize and spread over time, creating drifts of early spring color.
- Hyacinths: Fragrant, dense flower spikes in vibrant colors. Hyacinth bulbs can be grown in the ground or in pots for spring bloom. They typically require a winter chill period; in mild climates you should plan to prechill the bulbs for best results (more details below).
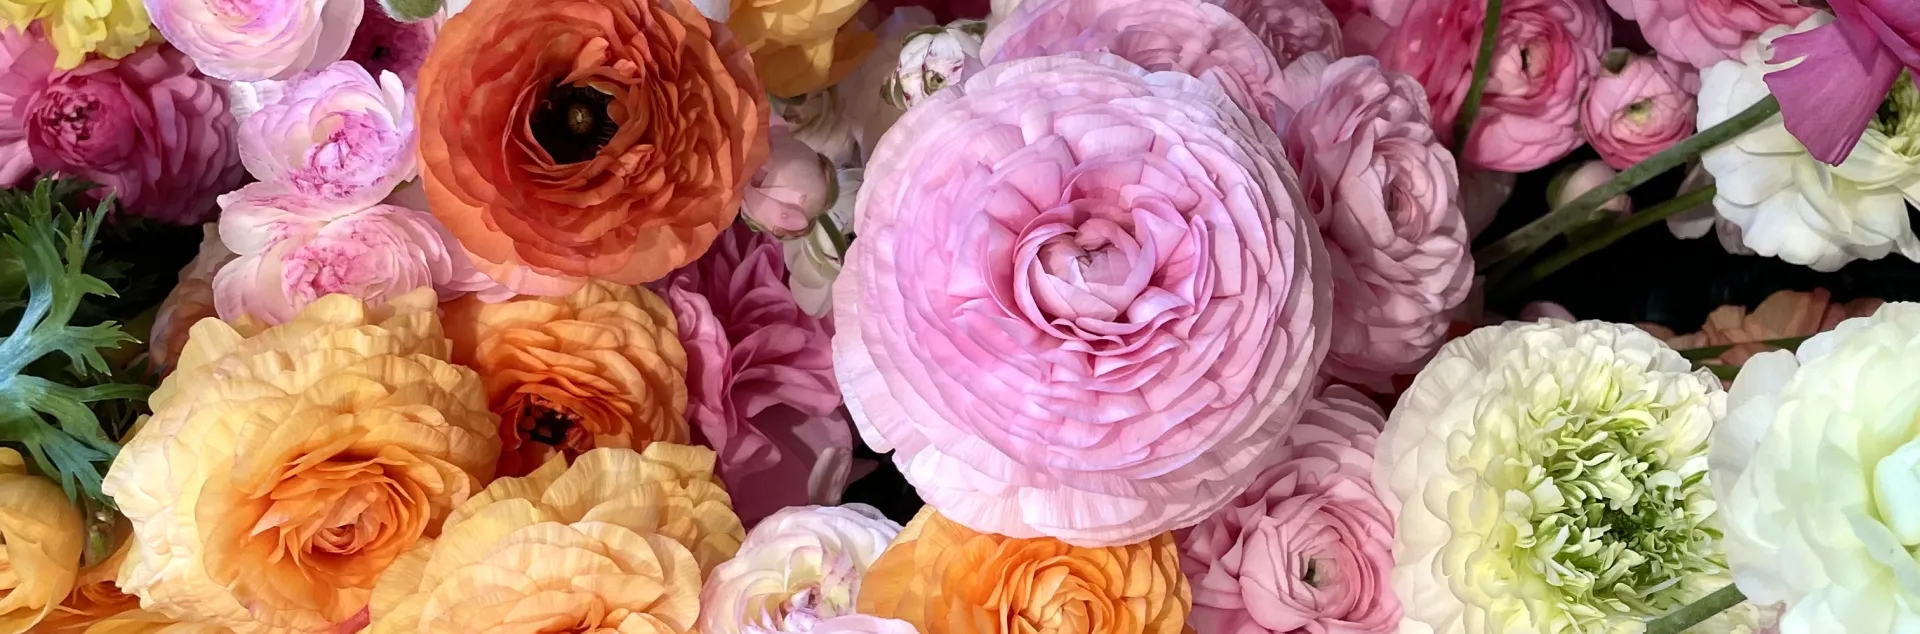
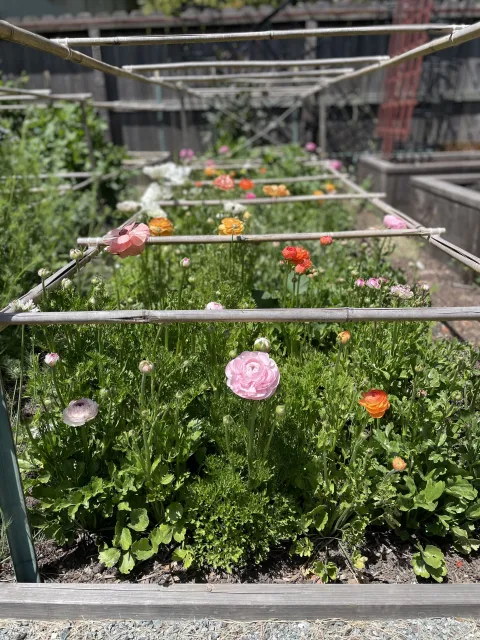
- Ranunculus, anemones, and other cut flowers: While many of the bulbs above can also be used for cut flowers, plants like ranunculus, anemone, and freesia will provide long stems and long-lasting blooms that are perfect for a vase. Freesias can be planted in fall and will reward you with extremely fragrant flowers every spring. Ranunculus and anemone corms can be planted in fall or even late winter for spring blooms. You’ll need to presoak these corms before planting - see more on that below.
- Other Fall-Planted Bulbs: Dutch iris (iris bulbs/corms) can be planted now to bloom in spring with orchid-like flowers. Even native California bulbs like Ithuriel’s spear (Triteleia laxa) or mariposa lily (Calochortus) can be planted in the fall and will add unique beauty to the spring garden.
Considerations for choosing and buying bulbs
Once you’ve decided on the types of bulbs, select high-quality specimens and suitable varieties for your garden:
- Know what you’re getting: What we often call “bulbs” may actually be different types of underground storage structures, including true bulbs, corms, tubers, and rhizomes. While all of these are similar in nature, there are some key differences, including where the growth comes from (bulbs grow from the top, tubers grow from the eyes, and rhizomes grow laterally), how to divide and store them, and more. Knowing the type of “bulb” you have will guide you at planting time and later in the season.
- Buy quality bulbs: Purchase bulbs from reputable sources and choose top-size, firm bulbs free of soft spots, decay, or mold. Note that many garden stores will only sell bulbs seasonally and do sell out of many popular varieties, so go early in the fall for the best selection.
- Climate considerations: Many spring bulbs handle our mild winters and dry summers well and will perennialize (bloom for several years) in the ground. In contrast, some highly cold-dependent bulbs, such as large hybrid tulips and hyacinths, may bloom best the first spring and then fizzle out. If you’d like to plant these varieties, you might consider treating them like annuals.
- Chill requirements: Some spring bulbs originate from regions with cold winters and require a chilling period to trigger proper bloom. In Alameda County, our soil may not stay in the optimal cold range long enough for these bulbs. Generally, daffodils, freesias, ranunculus, iris, anemones, and most minor bulbs will receive sufficient winter chill naturally outdoors. Tulips and hyacinths, however, perform best if given some extra chilling. For these, plan to prechill the bulbs in your refrigerator for about 4–6 weeks before planting them in fall. Place them in ventilated paper bags (away from apples or other ripening fruit that emit ethylene gas) and keep the fridge around 35–45°F. After 4–6 weeks of chilling, plant them promptly in the garden. The bulbs will then experience the rest of the cold period in the soil and should bloom more reliably come spring. Some retailers also sell pre-chilled bulbs if you don’t have the time, space, or desire to prechill bulbs yourself.
- Pest resistance: Take into account any pest pressure in your garden. Gophers, squirrels and deer will readily eat tulips, but they tend to ignore toxic or distasteful bulbs like daffodils.
- Pollinator-friendly choices: Many spring bulbs provide early food for pollinators when not much else is blooming. Anemones, grape hyacinth, crocus, and glory-of-the-snow are all known to be attractive to bees and other pollinators when they bloom. There are thousands of varieties to choose from! This daffodil “Replete” looks nothing like the more common yellow or white varieties, but will naturalize and repel critters just the same. Credit: Manya Scheps
When and where to plant fall bulbs
- Timing: The ideal window for planting spring-blooming bulbs in Alameda County is roughly late September through November. This allows bulbs to establish roots in the cool fall soil before winter. You can plant into December if needed, but earlier in fall is better so roots grow while the soil is still a bit warm. For more specific timing, many bulb packages will recommend when to plant in relation to the first frost date. You can look up frost dates by searching your town + “average frost dates”.
- Location: Most spring bulbs do best in full sun to partial shade. Choose a spot that gets plenty of sun in late winter and spring. Under deciduous trees can work well, since those trees will have lost their leaves in winter, allowing sun to reach the bulbs.
- Soil: Almost all bulbs prefer fast-draining soil and will rot in waterlogged ground. If your soil is heavy clay, you can improve drainage problems by mixing in organic matter (compost or well-rotted manure) down to about 8–12 inches deep.
- Garden or container: Bulbs can be planted directly in garden beds, in lawns (for certain naturalizing bulbs), or in containers. In-ground planting is best for bulbs you want to naturalize and spread. Containers are a great option if you have limited space or want to create moveable displays for your patio or entryway.
How to plant bulbs

- Prepare the area: Remove any weeds and gently loosen the soil in your planting area. Plan your layout – bulbs often look best in clusters or drifts. It can help to place the bulbs on the soil surface where you intend to plant each group. For a natural effect, some gardeners simply toss bulbs onto the soil and plant them exactly where they land, resulting in an informal cluster that mimics how they’d grow in nature.
- Prepare the bulbs (depending on species) Some “bulbs” like anemone and ranunculus corms require presoaking for a few hours before being planted. This is not true for all bulbs – many would rot by being presoaked! Read the label and planting instructions for your species, and use that to determine if any bulb preparation is needed.
- Dig the holes and plant: A common rule is to plant a bulb at a depth about 3 times its own height (measured from the base of the bulb to the soil surface). For example, a 2-inch-tall daffodil bulb would be planted about 6 inches deep. Many bulb packages will list the recommended planting depth – follow those specifics when available. Set each bulb in the hole pointy side up (that’s the shoot end) and the flatter, rooted end down. While a regular trowel works fine, if you are planting many bulbs, consider using a bulb-specific planting tool to make it easier to dig holes.
- Backfill and water: Cover the bulbs with the excavated soil and gently tamp it down. Water the area thoroughly right after planting to settle the soil. After this initial watering, you do not need to water regularly until the bulbs begin active growth – in fact, overwatering in fall/winter can cause bulbs to rot.
- Apply mulch: Cover the planted area with a layer of mulch to regulate soil temperature, retain moisture, and prevent weed growth. Mulch can also discourage squirrels from immediately noticing where you buried your bulbs.
- “Lasagna” layering for containers: If planting in pots, consider the “bulb lasagna” technique where different bulb types in the same container will create a succession of blooms. Place the largest, latest-blooming bulbs at the bottom (around 8–10 inches deep), cover with some soil, then add medium-sized mid-season bulbs at about 5–6 inches deep, then finally the smallest or earliest bulbs closer to the surface (3–4 inches deep). For example, a single large pot could have tulips on the bottom, hyacinths above them, and crocus or grape hyacinth near the top. They’ll emerge in phases, providing waves of color in one container.
Caring for bulbs after planting
The hard work is done! Once your bulbs are in the ground or pots, they begin growing roots through the fall and winter. After the initial deep watering at planting, you typically do not need to irrigate bulb plantings in fall or winter unless we have extended dry periods. If there’s no rain for a few weeks and soil is dry a few inches below the surface, water the bulb area moderately to ensure the roots stay hydrated (especially important for potted bulbs, which dry out faster). Avoid overwatering – remember, bulbs in soggy soil can succumb to rot.
In the spring, early green shoots of bulbs might be enticing to garden pests like slugs or snails. Monitor your plants and refer to UC’s slugs and snails guide if these creatures become a problem.
Once your plants begin growing in the spring, provide routine irrigation and care as-needed. After the plants bloom, allow the foliage to completely die back before you cut it off. While this spent foliage might not look nice, it’s providing much-needed energy to the bulb – ensuring even more blooms for you the following spring!
Conclusion
While planting fall bulbs doesn’t have the same immediate gratification as planting live plants, it’s a gift to your future self: you’re creating a vibrant spring future when your garden will come alive with color. This “set it and forget it” garden task is a great opportunity to get into the dirt despite shorter days and cooler temperatures. With proper selection, planting, and care, your bulbs will reward you not just for one season but for years to come, naturalizing and multiplying to create ever-bigger displays.
Additional Resources
The Hidden Beauty of Fall-Planted Bulbs
Plant bulbs in fall for spring beauty
Want to learn more?
This blog post is brought to you by the Help Desk of the UC Master Gardeners of Alameda County. Subscribe to our blog!
Have a gardening question? We'll help.
Visit our Help Desk page to submit your question and see additional ways you can reach us.